
Dear Diary,
So What's Actually Happening to Your Scalp?
You know how after years of acrylics on the big toe, some girls are finding out they don't have a toenail left? I'm going to hold your pinky toe as I ask this: what do you think years of tension and zero hair care routine is doing to your scalp?
We don't necessarily focus on the braid down. It's the fifteen minutes before the fifteen minutes people actually care about. But it's also one of the things deciding whether your hair is still going to be there in five years.

The Foundations And What They're Actually For
The pattern is never random. It's chosen for how the finished style needs to move, part, and lie flat. How many braids it takes depends on your density and what works for your hair, not always a template.
Flip over sew-in: Sometimes a single anchor braid is sewn around the perimeter of the head and then the rest of the hair is sewn back vertically. Recently we've been seeing a circular, rotating pattern also known as a beehive braid down.


Middle part sew-in: Horizontal, layered, clean centre parting. Often two small vertical anchor braids on each side right where the leave out sits. Predictable, fast, low maintenance and the industry default.
Sidepart sew-in: Same base as a middle part, parting shifted. Softens the face shape, reads more editorial, installs the same way.

2 part sew-in: Like a middle or side part but with 3-4 smaller rows between each leave out section, distributing weight so switching your part doesn't leave one side thin and the other bulky.

Quick weave: Bigger braids, way less tension. Larger cornrows spread the weight over more hair, so it doesn't need to be as neat. Nothing is being sewn on so there isn't a need for an anchor, tracks glue to a cap instead.
Clip ins and half wigs: Also bigger braids, for the same reason. Larger sections give the clips more surface to grip. A bigger braid means a more secure clip and less scalp tension.
Why Your Braid Down Is Breaking Your Hair Off
No moisture going in.
Dry hair braided under tension is already compromised before the first cornrow is done.
Extreme tension.
Braids installed too tight pull aggressively at the root. Constant mechanical pull inflames the follicle? That's how you get strands snapping at the base and traction alopecia, which damages the root permanently. Pain or a headache after your install isn't normal. It means it's too tight.
Dehydration after install.
Oil on the scalp isn't water. Without a water based leave in feeding moisture in, curly hair goes brittle and snaps on removal.
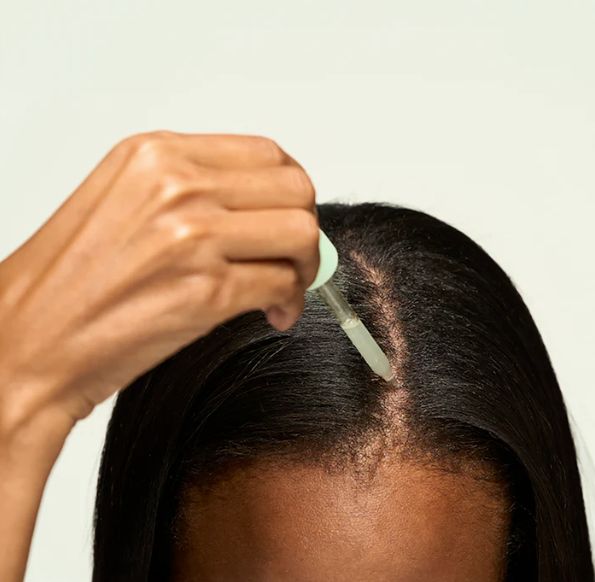
Tip: Scalp serums really get their chance to shine here because oil will not moisturise your scalp, no matter how many times we reach for it.
Tension bumps and traction folliculitis.
Inflamed follicles, usually from bacteria or fungal buildup. If you're seeing these, real damage is already happening. Causes:
-
Braids pulled too tight at the nape, or heavy synthetic hair straining the root
-
Gel or edge control trapping sweat and clogging follicles. We won't name names, but we all know which exact gel has snapped edges off.
-
Synthetic hair carrying alkaline coatings that irritate sensitive skin — this isn't always the case, but it very much can be, and it's important to know what your scalp can actually handle.


 Bumps show up on the hairline, nape, or anywhere on the scalp. Mild cases ease within days once braids are loosened. Don't add tension trying to fix them, and don't reach for essential oils as a first response. If it's not clearing, see a dermatologist or trichologist.
The nape takes the worst of it, it's the most fragile part of your head and usually the most pulled. If your braid down feels too tight at the appointment, say something. As your hair grows underneath, the tension only increases. Damage your hair now and you're compromising your ability to get it done again later.
A Braid Down Done Wrong
Pulling the ends of your hair upward during a braid down is a common technique but it's one that creates real problems. That upward pull puts direct tension on the nape, causes braids to stack rather than lie flat, and means tracks end up sewn over hair that isn't properly anchored to the scalp. The result is a compromised foundation: bulk where there shouldn't be any, hair under unnecessary strain, and breakage that was avoidable. If it doesn't lie flat, it isn't protecting you.
Quick Detour: Is the Beehive Method Actually Better?

Short answer: depends on your hair.
Braiding around from the nape helps the foundation lie flat instead of stacking hair on top of itself without a secure anchor. It's great for long or thick hair, and a solid pairing with a flip over sew in. But if your hair isn't long or thick and you're getting a flip over, the beehive isn't automatically the right call. Different hair types need different foundations. Know what you're actually signing up for.
Here's what the beehive does well:
Ultra flat, bulk-free base braided in a continuous spiral rather than multiple overlapping rows, it dramatically reduces lumps, bumps, and bulk. The result is a finish that reads as scalp, not helmet.
Even weight distribution and reduced tension: Unlike straight back patterns that concentrate pulling on specific areas like the nape or hairline, the beehive distributes the weight of extensions evenly across the entire head. Significantly more comfortable, significantly less stress on your edges.
Promotes length retention and growth: By minimising tension and keeping natural hair fully tucked away as a low manipulation protective style, it helps prevent breakage and supports healthy hair growth.
Long lasting durability: Formed from one continuous braid, there are fewer loose ends to slide out or unravel over time. This stability allows the install to last safely for however long you plan on keeping the hair in.
Withstands washing better: Because the braid ends are tucked securely within the circular pattern, the foundation resists matting, tangling, or coming undone during routine shampooing and maintenance.
And we know how difficult it can be to properly shampoo your natural hair when it's underneath a sew in, but think about it this way: if the hair isn't stacked on top of itself, if the braid down gets wet, it has room to actually dry. A flat, spiral foundation dries faster and more evenly than a stacked one. Which, honestly, has just sold me completely. I like to jump in the sea with my installs in and a braid down that can handle getting wet and dry out properly afterwards? That changes things for me because I cannot with that mildew smell when I take out my hair... The beehive is officially on the list for next time.
Fast and easy removal: When it's time to take the install down, you simply find the single tail end at the top and unweave in the opposite direction of the spiral. Remarkably quick.
I'll be honest, I've never personally tried the beehive method. But with thick, long natural hair, it's absolutely something I want to explore next install. The logic makes sense for my hair and I think the results would speak for themselves. I’ll try it and get back to you.
Before You Even Sit in the Chair

Turning up with a head full of product limits what your stylist can actually see and work with. Hair already loaded with product is harder to manage, and it may not work well with whatever is being used during the install, ultimately compromising their ability to give you what you actually came for. That doesn't mean arriving with no routine. It means incorporating the right one. A proper wash day beforehand, hair health first, right through to a clean product free canvas, does more for your braid down than anything applied at the appointment itself. There is so much you could be doing before the blow dry that will genuinely prepare your hair for what's coming. (See our in depth wash day routine for the full breakdown, we aren’t leaving you hanging sister)
What a Good Braid Down Actually Looks Like
-
Flat: small neat parts, no bulky bumps or lumps under your bundles
-
Low tension: edges and nape kept loose to medium, not tight. That's what prevents traction alopecia and headaches
-
Secured ends: braid tails crocheted, sewn, or tucked in, never left loose to add bulk at the bottom
An improper foundation means an improper hairstyle. Full stop. No matter how good it looks walking out the salon.
Most of this is written with a sew in in mind, but the same principles (hair and scalp integrity, the pre-appointment ritual) hold regardless of which style you're actually getting.
Picture this: an extremely tight, (un) protective style, zero hair preparation. Four weeks later you slick your hair back with no aftercare and wonder why your nape and edges are fighting for their lives. That's not bad luck. Even Cécred edge drops might need backup for that one.
Before you book your next appointment: learn your hair, research your style, and understand the part you play in getting the most out of it. Hair that's healthy, protected, and able to go back into any style you want, with your follicles intact.
With love and curls,
xoxo
The Curly Hair Diaries